Photoshop is a powerful and versatile tool for editing and creating images. By using Photoshop, you can ensure your 4×6 photos are perfectly cropped and framed. Here is a step-by-step guide to achieve the perfect 4×6 crop.
Step 1: Open the Image.
Open the photograph you want to crop and frame in Photoshop.
Step 2: Resize the Image.
Go to the Image menu, select Image Size, and change the image’s size to 6 inches wide by 4 inches high.
Step 3: Set the Resolution.
Set the Resolution field to 300 pixels per inch, or ppi.
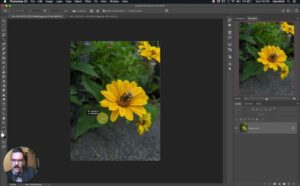
Step 4: Select the Specific Area.
Use the Crop Tool to select only the area you want to keep in your 4×6 photo.
Step 5: Drag Out the Crop Area.
Drag out the crop area to fit the 4×6 dimensions.
Step 6: Make Final Adjustments.
Make any necessary adjustments to the crop area, such as rotating or resizing it.
Step 7: Crop the Image.
Once you are happy with the crop area, click the checkmark icon or press enter to crop the image.
Step 8: Save the Image.
Save the image as a JPEG or TIFF file and you’re done!
By following these steps, you can easily create perfectly framed 4×6 photos using Photoshop.
8 Tips for Getting the Best Results from a 4×6 Crop Photo
- Choose a high-quality photo: Start with a high-resolution photo to ensure that your 4×6 crop will have the best possible quality.
- Choose the right orientation: Consider whether a vertical or horizontal orientation will work best for your image before cropping.
- Crop sensibly: Take care to avoid cropping out important elements in the image, such as faces or other details.
- Zoom in: To get the most precise cropping, zoom in on the image to get a better sense of what you’re working with.
- Use the grid lines: Many photo editing programs will allow you to add grid lines to help you crop precisely and evenly.
- Avoid extreme crops: Cropping too much of the photo can result in a distorted image. Stick to cropping only what is necessary.
- Consider the background: Be sure to consider the background of the image and how it will look once cropped.
- Save the original: Always save the original photo before you begin cropping, so that you can revert back to it if necessary.
Different Ways to Create a 4×6 Crop Photo from a Larger Image
- Use a photo editor: Most digital image editing software, such as Photoshop and GIMP, have a feature that allows you to crop an image to a specific size. This is the most precise way to create a 4×6 crop from a larger image.
- Use a photo printing app: If you are using a smartphone or tablet, you can use a photo printing app to crop and print a 4×6 photo from a larger image. Apps such as Print Studio and Printique offer this feature.
- Use a photo printing service: Many online photo printing services, such as Shutterfly and Snapfish, offer the ability to upload an image and select a 4×6 crop size. This gives you the ability to crop the image to the exact size you need.
- Trim the edges of the photo: If you don’t have access to a computer or photo printing service, you can simply trim the edges of the photo to create a 4×6 crop. This is not the most precise way to create a 4×6 crop, but it is a quick and easy option if you don’t have access to other methods.
- Use a photo printing kiosk: Many stores, such as Walgreens and CVS, have kiosks that allow you to upload and print a 4×6 photo from a larger image. This is a convenient option if you don’t have access to a computer or photo editing software.
The Benefits of Printing 4×6 Crop Photos Over Other Sizes
Printing 4×6 crop photos offers a number of benefits over other sizes. For starters, 4×6 crop photos are a convenient size that can easily fit into albums, frames, and other storage options. This makes them ideal for displaying in your home or sharing with friends and family.
Additionally, 4×6 crop photos are more cost-effective than other sizes. Printing 4×6 photos requires less ink and paper, making them an affordable option. This is especially important if you are printing large numbers of photos.
Finally, 4×6 crop photos provide more flexibility than other sizes. You can crop a 4×6 photo to create a variety of different compositions. This makes it easy to customize your photos to achieve the desired effect.
In conclusion, 4×6 crop photos offer a number of advantages when compared to other sizes. They are convenient, cost-effective, and provide increased flexibility. For these reasons, 4×6 crop photos are an excellent option for preserving and displaying your memories.
How to Choose the Right 4×6 Crop Photo Background
When it comes to choosing the right 4×6 crop photo background, there are a few important factors to consider. First, think about the purpose of the photo. Are you creating a photo album or a wall art piece? Knowing the purpose of the photo will help determine the type of background you should use.
Next, consider the colors and textures of the background. If you are creating a photo album, choose a background that will be subtle and not detract from the subject of the photo. For wall art pieces, choose a background that will be the focal point and will make the photo stand out.
Choose a background that is complementary to the photo’s subject. If the photo is of a person, choose a background color that will make them stand out. If the photo is of a landscape, choose a background that will bring out the beauty of the landscape.
Finally, make sure the crop size of the photo matches the background. A 4×6 crop photo should be placed on a 4×6 background. If the background is too large, the photo will be lost. If the background is too small, the photo may be distorted.
By considering the purpose of the photo, the color and texture of the background, and the crop size of the photo, you can choose the right 4×6 crop photo background for your project.