Microsoft Photo Editor is a great tool for enhancing digital photos. It has a wide range of features that can help you achieve the perfect look for your photos. This tutorial will provide you with an overview of how to use Microsoft Photo Editor in Windows 7 to enhance your digital photos.
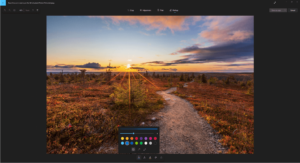
First, open Microsoft Photo Editor. Once opened, you will see a window with a toolbar at the top, and a preview window on the right-hand side. The toolbar contains a variety of editing tools which can be used to enhance your photos.
To begin, select the photo you would like to edit from your computer. Once the photo is loaded in the preview window, you can begin to edit it. You can use the various tools available in the toolbar to adjust brightness, contrast, and color levels. You can also crop, resize, and rotate the photo to fit your needs.
Once you are happy with the adjustments you have made, you can save the edited photo to a file on your computer. To do this, click the “Save As” button in the toolbar and select the file format you would like to save the photo in.
Using Microsoft Photo Editor in Windows 7 is a great way to enhance your digital photos. With its easy-to-use tools, you can quickly and easily adjust the brightness, contrast, and color of your photos, as well as crop and rotate them. With a few simple steps, you can create stunning images that will impress your friends and family.
Exploring the Features of Microsoft Photo Editor Windows 7
Microsoft Photo Editor is a powerful and versatile photo editing tool available for Windows 7 users. It is capable of performing various functions, such as creating and editing images, scanning photos, and enhancing photos. This article will explore the various features of Microsoft Photo Editor that are available in Windows 7.
The Microsoft Photo Editor allows users to open and edit photos from a variety of sources. It supports multiple file formats, including bitmap, JPEG, GIF, and PNG. Once an image is opened, users can resize, rotate, and crop the image, as well as adjust the brightness and contrast. Additionally, users can apply a variety of special effects, including sepia, grayscale, and solarize.
Another useful feature of Microsoft Photo Editor is its ability to scan photos. The software can be used to scan a variety of items, including negatives and prints. Once scanned, the images can be edited and enhanced.
Microsoft Photo Editor also includes a powerful set of tools that can be used to enhance photos. These tools include sharpening, red-eye correction, and color balancing. Additionally, users can add text and frames to their photos.
Finally, Microsoft Photo Editor allows users to save their images in a variety of formats. These formats include JPEG, TIFF, and PNG. Additionally, users can save their images for use with webpages and email.
In conclusion, Microsoft Photo Editor is an incredibly powerful photo editing tool available for Windows 7 users. It allows users to open, view, and edit photos from a variety of sources. It also supports scanning and provides a powerful set of tools for enhancing photos. Finally, it allows users to save their images in a variety of formats.
Tips and Tricks for Working with Microsoft Photo Editor Windows 7
1. Use the Auto Enhance feature to quickly adjust the lighting and contrast of your photos. It will automatically apply the optimal settings to improve the look of your image.
2. Use the Select tool to easily cut out objects from your photo. You can make the selection by dragging your mouse or using the lasso tool.
3. Use the Zoom tool to get a closer look at the details of your photo. You can zoom in and out with the wheel of your mouse.
4. Use the Crop tool to remove unnecessary parts of your photo. You can choose from preset sizes or define your own size.
5. Use the Rotate tool to rotate your photo in 90-degree increments. This is useful for correcting orientation issues.
6. Use the Red Eye Removal tool to quickly remove red eye effects. You can select the affected area with the mouse and the tool will automatically adjust the color.
7. Use the Text tool to add captions or other text to your photos. You can choose the font, size, and color of the text.
8. Use the Image Adjustments tool to quickly adjust the brightness, contrast, saturation, and color balance of your photos.
9. Use the Sharpen tool to make your photos look clearer and sharper. You can adjust the strength of the effect to get the desired result.
10. Use the Retouch tool to remove blemishes or unwanted objects from your photos. You can select the area to be retouched and then adjust the brush size and strength.