Creating professional-looking graphics can be a daunting task, but with the right tools, it can be much easier. A transparent image editor is an invaluable tool for creating professional graphics, allowing you to make adjustments, add text, and even create layers of images. Here are the steps to use a transparent image editor to create professional-looking graphics.
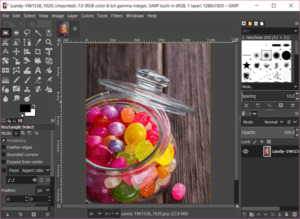
First, open the transparent image editor of your choice. Many image editors are available, some of which are free to use. Make sure to look for one that has features such as layers, blending options, and text tools.
Once you’ve opened the editor, you can begin creating your image. Start by selecting the background color or image. This will be the base layer of your image.
Next, add layers to your image. This could be text, shapes, or other images. Adjust the size and position of each layer to create the desired look. Use the blending options to blend layers together for a more professional finish.
Once you’ve created the layers, you can add text to the image. Use the text tool to customize the size and font of the text. You can also adjust the color of the text and add effects if desired.
Finally, save your image and export it in the desired format. Most transparent image editors have the ability to export in formats such as PNG, JPEG, and GIF.
By following these steps, you can easily create professional-looking graphics using a transparent image editor. With some practice, you’ll be able to create stunning graphics quickly and efficiently.
Tips and Tricks for Enhancing Your Transparent Images with a Transparent Image Editor
1. Utilize layers to create a layered effect: Transparent image editors often have the ability to create multiple layers in an image. This is useful for making complex edits, as it allows you to adjust a single layer without affecting the other layers.
2. Utilize blending modes to create unique effects: Transparent image editors often have a variety of blending modes, which allow you to mix different layers together to create unique effects. Experiment with different blending modes to create a unique look.
3. Add text to your images: You can use text to add a personal touch to your images. Transparent image editors often have text editing tools, allowing you to add text to your images with ease.
4. Use filters to enhance the look of your images: Filters are a great way to quickly enhance the look of your images. Transparent image editors often have a variety of pre-set filters that can be applied to your images.
5. Adjust the brightness and contrast of your images: Brightness and contrast adjustments can be used to make your images look more vivid and vibrant. Transparent image editors have tools that allow you to make such adjustments with ease.
6. Utilize color adjustment tools: The color adjustment tools in transparent image editors are invaluable for making subtle changes to the colors in your images. Experiment with different color adjustments to create the look you desire.
7. Utilize masking tools to isolate areas of an image: Masking tools are useful for isolating certain areas of an image. This is useful for making complex edits, as it allows you to make adjustments to a single area without affecting the rest of the image.
8. Utilize selection tools to make targeted edits: Transparent image editors have selection tools that allow you to make targeted edits to an image. This is useful for making complex adjustments, as it allows you to make adjustments to a single area of an image without affecting the rest of the image.
The Benefits of Using a Transparent Image Editor for Social Media Images
Creating an engaging and effective social media image is essential for any company or individual looking to make a lasting impression on their followers. A transparent image editor can be a powerful tool for creating images that stand out and capture attention. Here are some of the key benefits of using a transparent image editor for creating social media images.
1. Enhanced Visuals: A transparent image editor can help you produce visuals that are more visually appealing and effective. By using a transparent image editor, you can add different layers, overlays, and filters to your images, creating a more interesting and attractive design. This can help to make your images stand out from the crowd, improving engagement with your followers.
2. Improved Branding: A transparent image editor makes it easier to incorporate your brand’s logo, color scheme, and other elements into your social media images. This can help to strengthen your brand’s identity and create a consistent look and feel across your social media images.
3. More Flexibility: A transparent image editor provides you with greater flexibility in terms of editing and manipulating your images. You can easily move elements around, resize them, or add new elements to your images. This can help you create images that perfectly capture your message and appeal to your target audience.
4. Easier Customization: With a transparent image editor, you can easily customize your images to suit the specific requirements of your social media platforms. You can add text and other elements in different sizes and font styles to match the design of your profiles.
Using a transparent image editor for creating social media images can help you to produce more attractive and effective visuals that better capture your message and appeal to your followers. This can help you to make a more lasting impression on your social media accounts and strengthen your brand’s identity.