Creating a professional-looking image using a photo layer editor can be a daunting task, but it doesn’t have to be. By following these simple steps, you can produce a high-quality image that will make a great addition to your portfolio.
First, choose the image that you want to edit. You can use photos or images from websites or create your own artwork. Once you have chosen the image, open it in your photo layer editor.
Second, adjust the overall brightness and contrast of the photo. This can be done by using the sliders or presets to adjust the settings. This will ensure that the photo looks crisp and professional.
Third, add layers of images, text, or other elements to the photo to enhance it. When adding layers, make sure that you use the “lock” feature to keep your layer in place and prevent it from moving around. You can also use the “blend” feature to blend different layers together.
Fourth, use the “crop” feature to trim down the image to the desired size. This will help you create a more professional look and ensure that the image is the right size for your project.
Fifth, save your layer to preserve your work. You can save it as a jpg, png, or even a pdf file.
Finally, share your image with the world. Share it on social media, print it out, or use it as a background on your website or blog.
By following these steps, you can use a photo layer editor to create a professional-looking image. With some practice and experimentation, you can create unique and eye-catching images that will draw attention and impress viewers.
Creating an Impressive Photo Project With a Photo Layer Editor
Creating an impressive photo project with a photo layer editor can be a great way to showcase your creativity and skills. Layer editors are powerful tools that allow you to combine several images into one, allowing you to create unique and original compositions. To begin, you will need to select the right photo layer editor for your project. There are many options available, including both free and paid versions.
Once you have selected the photo layer editor that is best for your project, you will need to gather all of the photos you plan to use. You can use photos you have taken yourself, or you can select images from a photo library. If you are using your own photos, make sure that they are high-quality and are in the same color format.
Once you have gathered all of your photos, the next step is to start editing. You can use the photo layer editor to combine multiple images and create the desired effect. The layer editor will allow you to adjust the size and position of each layer, as well as to add text and other elements.
Once you are satisfied with the composition, you can export the project as an image or a video. This will allow you to share your project with others, or you can print it out and hang it as a physical piece of art.
Creating an impressive photo project with a photo layer editor is a great way to express your creativity and showcase your skills. With the right tools and a little bit of patience, you can create an amazing project that will be sure to impress.
Exploring the Features of a Photo Layer Editor: What’s Possible?
A photo layer editor is an invaluable tool for any photographer or graphic designer. By allowing users to layer and edit multiple images, a photo layer editor can help create stunning visuals with a high degree of precision and control. With the right photo layer editor, the possibilities are endless.
One of the most basic features of a photo layer editor is the ability to select and manipulate individual layers. With this feature, users can easily move and rotate objects in the image, as well as adjust their size and shape. Additionally, users can also modify the opacity and blending modes of each layer, allowing them to create complex compositions with ease.
Another useful feature of a photo layer editor is its selection tools. These tools allow users to quickly identify and select specific regions of an image for further editing. This is especially helpful when creating a composite of multiple images, as users can easily select the areas they wish to combine.
A good photo layer editor should also have support for layer masks. Layer masks allow users to mask out parts of a layer, making them invisible or partially visible. This is especially useful when creating complex compositions with multiple images, as masks can be used to seamlessly blend the images together.
Finally, a photo layer editor should have an array of tools for adjusting lighting and color. By adjusting the brightness, contrast, hue, and saturation of an image, users can create stunning visuals with minimal effort. Additionally, users can also use a photo layer editor to add filters and effects to images, giving them a unique look and feel.
In conclusion, a photo layer editor is a powerful tool for photographers and graphic designers. With its selection, editing, and masking capabilities, a photo layer editor can be used to create stunning visuals with ease. Additionally, its array of lighting and color adjustment tools allow users to quickly and easily customize the look of their images. With a photo layer editor, the possibilities are virtually endless.
Enhancing Your Photos With a Photo Layer Editor
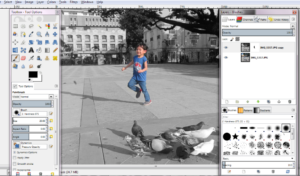
A photo layer editor is a powerful tool for editing and enhancing photos. It is used by professional photographers and graphic designers to create stunning images. With a photo layer editor, you can combine multiple images into one, adjust the lighting and contrast, and even add effects to your photos.
The first step to using a photo layer editor is to open the software. Most photo layer editors are available as free downloads or can be purchased as a one-time fee. Once you have the software open, you will be able to access the tools you need to start editing.
The next step is to select the images you want to work on. You can either choose from stock images or upload your own. Once you have selected your images, you will be able to start editing.
Photo layer editors come with a variety of tools that allow you to adjust the brightness and contrast, add text and graphics, and even create special effects. Using these tools, you can make your photos look more professional and appealing.
When you are done editing your photos, you can save them in a variety of formats, including JPEG, TIFF, and PNG. This will allow you to share your work with others or print it out.
Using a photo layer editor is a great way to enhance your photos and make them look more professional. With a few simple steps, you can quickly and easily create stunning images that you can be proud of.
Using a Photo Layer Editor for Creative Image Manipulation
Photo layer editors are powerful tools for creative image manipulation. With a photo layer editor, you can take your photographs to the next level and create stunning, unique images.
Photo layer editors allow you to work on individual layers of an image, giving you more control over the final result. You can use the layers to add elements such as text, shapes, and filters to an image, or to make adjustments to color, brightness, and contrast. You can also combine multiple images into one with a photo layer editor.
One of the most common uses of a photo layer editor is for creating composites. This is when you combine multiple images into one to create a unique, eye-catching result. For example, you could combine a landscape with a portrait of a person, or a cityscape with a starry sky. You can also use a photo layer editor to add special effects to an image, such as combining multiple images to create a double exposure.
Photo layer editors are also helpful for making small adjustments to an image, such as adjusting the color or brightness. This can be especially helpful when you’re trying to create a cohesive look across a series of images. You can also use a photo layer editor to add text and graphics to your images, such as logos or slogans.
Photo layer editors are an excellent tool for creative image manipulation. They allow you to combine multiple images into one, add text and graphics, and make small adjustments to an image. With a photo layer editor, you can take your photographs to the next level and create stunning, unique images.
Tips and Tricks for Using a Photo Layer Editor Effectively
1. Learn the basics: Familiarize yourself with the tools available in the photo layer editor you are using. This will help you understand the different effects and settings available and how to manipulate them to create the desired result.
2. Experiment: Don’t be afraid to experiment with different effects and settings to see what works best for the photo you are editing. You may end up with something unexpected that can be even more appealing than what you originally had in mind.
3. Practice: With practice, you will be able to create stunning results with the photo layer editor. Most editors have tutorials and practice sessions to help you get the hang of the software.
4. Work in increments: Make small changes to the image rather than making drastic changes all at once. This will help you keep track of the changes you make and make it easier to go back and make adjustments if needed.
5. Take your time: Quality takes time, so don’t rush when editing your photos. Work at a pace that allows you to properly adjust the settings and make sure the results look exactly as desired.
6. Layer effects: When using a photo layer editor, you can add multiple layers of effects to create a stunning result. This will allow you to make creative changes to the photo and have more control over the outcome.
7. Save your work: Always save your work when using a photo layer editor. This will ensure that you don’t accidentally lose your work and can revisit the project in the future.