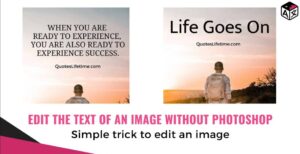
Editing text in an image can be a useful skill for any beginner to have. With the right tools, it is fairly straightforward and can be done quickly. The following steps provide an overview of the process:
- Find the image you want to edit. Depending on the image format, you may need to convert it to a suitable format for editing, such as .jpg.
- Select the right software. There are many image editing programs available, both free and paid. Popular options include Adobe Photoshop and GIMP.
- Open the image in the software and select the text you want to edit. This can be done with the selection tool or by clicking directly on the text.
- Make your changes. Depending on the software, you may be able to change the font, color, size, and other aspects of the text.
- Save the image. Make sure to save it in a format that will preserve the changes you have made.
With these steps, beginners should be able to quickly and easily edit text in an image.
The Best Tools for Editing Text in an Image
- Adobe Photoshop: Adobe Photoshop is the industry-standard image editing software for professional photographers and graphic designers. It offers a wide range of tools for editing text in an image, including warp, distort, and transform functions. You can also add effects and create complex text designs.
- GIMP: GIMP is a free open-source image editor that has a wide range of features for editing text in an image. It has a text tool that allows you to add, edit, and manipulate text, as well as the ability to warp, distort, and transform text. Additionally, GIMP has a variety of filters and effects to help you create a unique design.
- Pixlr: Pixlr is a free online image editor that has a wide range of tools for editing text in an image. It has the ability to add, edit, and manipulate text, as well as the ability to warp, distort, and transform text. Additionally, Pixlr has a variety of filters and effects to help you create a unique design.
- Adobe InDesign: Adobe InDesign is a professional page layout and design program that is used by many graphic designers. It has a powerful set of tools for creating complex text designs, including the ability to add, edit, and manipulate text. It also has a wide range of filters and effects to help you create a unique design.
Tips for Improving Text Quality During Image Editing
- Ensure that the text is clearly visible and readable. Make sure that the font size, color, and typeface are appropriate for the image.
- Avoid placing text on top of images with busy backgrounds, as this can make the text difficult to read.
- Adjust the contrast of the text to make it stand out from the image.
- Consider adding a drop shadow or outer glow to the text to make it stand out from the image.
- Use high-resolution images to ensure that the text is sharp and clear.
- Utilize vector graphics for text, as this will produce a higher-quality result.
- Use a graphics program that allows for easy text manipulation.
- Adjust the kerning and tracking of the text to make it easier to read.
- Utilize anti-aliasing filters to ensure that the text appears smooth and crisp.
- Save the final text as a separate layer, as this will make it easier to adjust or modify in the future.
Creative Ways to Use Text in an Image
- Use a text overlay to communicate a concept or message. This can help to quickly and effectively communicate a thought or idea in the image.
- Add text to the image to enhance its storytelling. This can be done by adding quotes, titles, or captions to the image to provide more context.
- Use text to highlight key features of the image. This can be done by adding labels or tags to important objects in the image.
- Create a textured background with words or phrases. This can add a unique and creative touch to the image.
- Utilize typography to draw attention to the main subject. This can be done by using bigger and bolder fonts to make the subject stand out.
- Incorporate text into the image to create a unique design. This can be done by using shapes and patterns made up of words or phrases.
Understanding Fonts and How They Affect Image Editing
Fonts are an important part of any image editing project. They can have a huge impact on the overall look and feel of the image. By understanding the basics of font selection and how they affect image editing, you can create images that are both aesthetically pleasing and effective.
The first thing to consider when selecting a font is the size. Fonts come in a variety of sizes, from tiny to enormous. The size of the font should be appropriate for the size of the image. For example, a larger font may be necessary for a larger image, while a smaller font may be more appropriate for a smaller image.
The second factor to consider is the style of the font. Different fonts have different characteristics, such as serifs, sans serifs, and script fonts. Serif fonts are often used for formal documents, while sans serif fonts are more suitable for informal documents. Script fonts can be used to add flair and personality to text.
Another factor to consider is the spacing of the font. Fonts can be spaced differently to create a more dynamic look. For example, a wider spacing can add more emphasis to certain words, while a tighter spacing can make text easier to read.
Finally, font color is also important. Different colors can create different moods and emphasize certain words or phrases. For example, a bright color can draw attention to a particular word or phrase, while a subtle color can create a more subdued look.
By understanding fonts and how they affect image editing, you can create images that are both visually appealing and effective. Fonts are an important part of any image editing project, so it is important to choose the right font for the right task.