Whether you are a professional photographer or an amateur, you want to ensure your photos have the highest quality possible. Unfortunately, many photos are taken in low-resolution settings, which can significantly reduce the quality of the photo. Fortunately, you can easily change the resolution of your photos to maximize their quality. Here are the steps you should take to change the resolution of your photos for maximum quality.
First, you need to know what resolution you should be using for your photos. The resolution you should use will depend on what type of photo you are taking and how you plan to use it. For example, if you are shooting a photo for a website, you should select a resolution of 72 pixels per inch (ppi). If you are shooting a photo for a print publication, you should select a resolution of 300 ppi.
Once you have determined the resolution you should use for your photos, you need to change the settings on your camera. To do this, you need to open the menu on your camera and select the “Image Quality” option. From there, you can select the resolution you would like to use.
Once you have changed the image quality settings, you can begin taking photos with the new resolution. If you are using a digital camera, you may need to transfer the photos to your computer before you can view them.
Finally, you can use a photo editing program to make any necessary adjustments to the photos. You can use the software to crop, rotate, and adjust the brightness, contrast, and color of the photos. This will help ensure that your photos have the highest quality possible.
By following these steps, you can easily change the resolution of your photos for maximum quality. With a few simple changes, you can ensure that your photos look their best.
5 Tips for Taking High Quality Photos With Lower Resolution Cameras
1. Use Good Lighting: Lighting can make or break a photo, even with a lower resolution camera. Use natural light from windows or other sources whenever possible, and if you’re using an artificial light source, make sure it’s diffused through a sheet or other soft material.
2. Use Tripods: Handheld cameras can be shaky, and this can create blurry photos. To reduce this problem, use a tripod or other stabilizing device. This will help to ensure your photos are crisp and clear.
3. Increase ISO: Increasing the ISO setting of your camera can help to improve the quality of the photos you take with a lower resolution camera. However, be aware that increasing the ISO can also create noise in your photos.
4. Avoid Digital Zoom: Digital zoom can cause your photos to become distorted and blurry. If you need to zoom in, walk closer to the subject instead of using the digital zoom feature.
5. Use Post-Processing Software: Many cameras come with software that allows you to edit and enhance your photos after you take them. These programs can help to reduce noise and sharpen photos taken with a lower resolution camera.
Exploring the Impact of Changing Your Photo Resolution on Image Quality
Changing the resolution of an image can vastly impact the quality of the image. Resolution refers to the number of pixels, or picture elements, that make up an image. A higher resolution image contains more pixels, resulting in a clearer, sharper image with more detail. Lower resolution images have fewer pixels, resulting in a blurrier and more pixelated image.
When making changes to the resolution of an image, it is important to consider the intended purpose of the image. If the image is intended for print, a higher resolution is better, since printed images should be detailed and clear. Generally, the optimal resolution for printed images is 300 dots per inch (dpi). If the image is intended for viewing on the web, a lower resolution is better, since web images should not be too large in size, as this can slow down page loading times. Generally, the optimal resolution for web images is 72 dpi.
It is also important to consider the source of the image and the amount of detail in the original. For example, a high-resolution photograph taken with a digital camera will look better than a low-resolution image taken with a smartphone. Similarly, an image with a lot of detail, such as a complex landscape, will look better at a higher resolution than a simple image, such as a solid color.
When changing the resolution of an image, it is important to be aware of the potential impact on image quality. Higher resolution images will be clearer and sharper, while lower resolution images will be blurrier and more pixelated. The optimal resolution for an image should be determined based on the intended purpose of the image and the amount of detail in the original.
How to Quickly Change Your Photo Resolution for Different Platforms
In today’s digital world, it is essential to know how to quickly change the resolution of your photos for different platforms. This is because different platforms have different requirements for the resolution of images. For example, a photo that looks great on a website may look pixelated on a billboard. To ensure that your photos look great in all formats, it is important to adjust the resolution of the photos. Here are some tips on how to quickly change your photo resolution for different platforms.
First, you will need to know the resolution requirements of the platform you are using. Different platforms have different requirements for the resolution of images, so it is important to take note of this before you begin. Once you have the resolution requirements, you can begin to adjust the resolution of your image.
The easiest way to adjust the resolution of an image is to use an image-editing program such as Photoshop or GIMP. These programs allow you to easily resize and crop the image to the desired resolution. You can also adjust the image’s resolution by changing the number of pixels per inch (PPI) or dots per inch (DPI).
Another way to quickly change the resolution of a photo is to use an online image converter. These services allow you to easily upload an image and convert it to the desired resolution. This can be a great option if you don’t have access to an image-editing program.
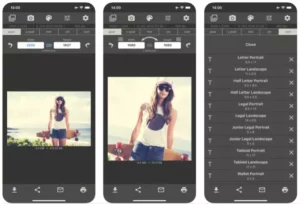
Finally, you can also use mobile apps to quickly change the resolution of your photos. There are many apps available for both iOS and Android devices that allow you to quickly resize and crop your images. These apps are especially useful for quickly changing the resolution of photos taken with a smartphone.
By following these tips, you can quickly change your photo resolution for different platforms. Knowing how to adjust the resolution of images can help ensure that your photos look great in all formats.
What to Look for When Choosing the Right Photo Resolution for Your Needs
When selecting a photo resolution for your needs, there are several factors to consider.
First, you need to determine what type of device the photo will be used on. Different devices require different resolutions. For example, if you are creating a website, you will likely need a higher resolution than if you are printing an image.
Second, consider the size of the photo. Higher resolutions will produce larger file sizes. If you are printing an image, you will need to choose a resolution that will provide enough detail while still keeping the file size manageable.
Third, decide what type of quality you want in your photo. Higher resolutions will produce higher quality images, but this can come at a cost. You should weigh the cost of the higher resolution against the quality you need for the project.
Finally, consider the end goal for the photo. If you are using the image for a website, you may need to compress it to ensure it loads quickly. If you are printing an image, you will want to ensure it is a high-quality image.
By considering these factors, you can make an informed decision about the photo resolution that will best meet your needs.