Overlay photo editors are becoming increasingly popular in the digital photography space. They allow users to combine multiple images into a single composition, creating a unique and visually appealing effect. With the right tools and techniques, users can create stunning images with a professional-looking finish.
Overlay editors provide a range of features and tools that can be used to enhance a photo. For instance, they can be used to adjust the brightness, contrast, and color of an image. Additionally, they can be used to adjust the size and position of elements within a photo, as well as apply special effects such as blur, vignette, and filters. By using these features, users can create beautiful compositions that would otherwise be impossible to achieve with a standard photo editor.
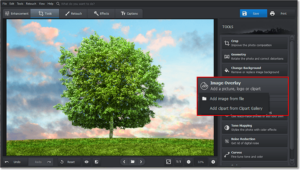
Another great advantage of using an overlay editor is that it allows users to combine multiple images into a single photo. This is especially useful for creating collages and other multi-layered compositions. For example, users can layer multiple photos to create a stunning visual effect. Additionally, they can also layer text, graphics, and other elements to further enhance their photos.
Finally, using an overlay editor is relatively easy and straightforward. Most editors provide an intuitive user interface with clear instructions and helpful tips. This makes it easy for users to quickly learn how to use the software and start creating stunning images right away.
Overall, overlay photo editors can be an invaluable tool for photographers who want to take their images to the next level. With the right tools and techniques, users can quickly and easily create stunning compositions with a professional-looking finish.
Benefits of Using an Overlay Photo Editor
An overlay photo editor is an application that allows users to apply graphic elements or textures to their photos. It is an effective way to add creative flair to your photos and make them stand out. There are many benefits of using an overlay photo editor, which include the following:
1. Improved Visual Quality: An overlay photo editor allows users to apply various types of textures, effects, and filters to their images. This can help to enhance the visual quality of the photos, making them look more professional and eye-catching.
2. Increased Creative Control: With an overlay photo editor, users have the ability to customize their images the way they want. This gives them the freedom to experiment and create unique photos that stand out from the rest.
3. Easy to Use: Overlay photo editors are usually user friendly and easy to use. This means that even beginners can use them to create stunning images with minimal effort.
4. Cost Efficiency: Overlay photo editors are usually available for free or at a low cost. This makes them an affordable and cost-effective way to enhance photos without the need for expensive software.
Overall, an overlay photo editor can be a great tool for those who want to add creative flair to their photos. It is an easy, cost-efficient way to improve the visual quality of your photos and give them a professional look.
Tips for Creating Stunning Overlay Effects
1. Consider the Color Scheme: When creating an overlay effect, one of the most important elements to consider is the color scheme. Choose a color palette that is complementary and will properly enhance the photo that you’re working with.
2. Use Blending Modes: One of the most powerful tools for creating stunning overlay effects is to use blending modes. This allows you to mix the colors in the overlay with the colors in the photo, giving it a unique and eye-catching look.
3. Adjust the Opacity: To achieve the perfect level of opacity for your overlay, you can use the “Opacity” settings to adjust the transparency. This will ensure that the overlay effect is subtle enough to not overpower the photo, but still be noticeable.
4. Use Textures and Patterns: To give your overlay effect a unique look, you can experiment with textures and patterns. Try using different textures and patterns to layer over the photo, such as grainy or abstract visuals, to create an interesting effect.
5. Add a Vignette Effect: To draw attention to the main subject of the photo, you can use a vignette effect. This will darken the edges of the photo, creating a subtle yet effective focus on the center.
6. Keep it Simple: While it’s tempting to add as many effects as possible, it’s important to remember to keep the overlay effect simple. Too many effects can make the photo look cluttered and mess with the overall look.
Different Types of Overlay Photo Editors Available
Overlay photo editors provide a way for photographers and graphic designers to create interesting effects with their work. There are a variety of different types of overlay photo editors available, each offering a unique set of capabilities and features. Here are some of the most common types of photo editors that use overlay effects.
1. Layer Photo Editors: Layer photo editors allow users to layer multiple images and effects together to create a unique result. They offer a wide range of tools and features, including the ability to adjust the opacity of layers, blend colors, and add textures.
2. Texture Overlay Photo Editors: Texture overlay photo editors allow users to add textures and patterns to existing photos. These editors typically have a library of textures and patterns that users can choose from, and the ability to adjust the size, shape, and opacity of each texture.
3. Color Overlay Photo Editors: Color overlay photo editors allow users to change the colors in existing photos. They typically offer a range of color adjustment tools, including hue, saturation, brightness, and contrast.
4. Mask Overlay Photo Editors: Mask overlay photo editors allow users to add masks to existing photos. These masks can be used to hide or reveal specific parts of the image, or to create interesting effects with color.
5. Brush Overlay Photo Editors: Brush overlay photo editors allow users to add brush strokes to existing photos. These brushes can be used to add texture, color, or to paint areas in the photo.
These are just a few of the types of overlay photo editors available. Each type of editor offers its own unique set of features and capabilities, so be sure to take the time to explore the different options in order to find the one that best suits your needs.
How to Choose the Right Overlay Photo Editor for You
Choosing an overlay photo editor can be daunting, especially with so many available on the market. To make the process easier, it’s important to consider the features and capabilities of an editor to ensure it meets your needs. Here are some key points to consider when selecting the right overlay photo editor for you.
1. Intuitive Interface: A good overlay photo editor should have a user-friendly interface that is easy to navigate. Look for an editor that is well organized, with clear and intuitive features that are easy to utilize.
2. Editing Tools: Check to see what type of editing tools are available in the photo editor. Are there options for cropping, resizing, adding text, and other effects? Consider the specific tools you need to achieve your desired result.
3. Image Quality: Ensure the editor you choose is capable of producing high-quality images. Check to see what types of file formats are supported, such as JPG, PNG, and TIF.
4. Sharing Options: Look for an editor that offers a variety of sharing options, such as email, social media, and cloud storage. This will allow you to easily share your work with others.
5. Price: As with any purchase, make sure to consider your budget when selecting an overlay photo editor. Some editors are free, while others require a subscription or one-time payment.
By taking the time to consider these points, you can ensure you select the right overlay photo editor for your needs. With the right editor, you can create stunning photos that will wow your audience.
Common Mistakes to Avoid When Editing Overlays
1. Not Checking the Spelling and Grammar: When editing overlays, it is essential to ensure that all spelling and grammar errors are corrected. If left unchecked, these errors can lead to confusion and miscommunication.
2. Not Using a Consistent Color Scheme: It is important to ensure that the colors used in the overlay are consistent throughout the design. This will help to create a cohesive visual experience for the viewer.
3. Not Paying Attention to the Fonts: Choosing the right font for your overlay is important as it can influence how the content is perceived. It is important to choose a font that is easy to read and not overly complex.
4. Not Considering the Overlay’s Placement: Consider where the overlay will be placed and how it will fit into the overall design. If the overlay is placed in the wrong spot, it could end up detracting from the design instead of enhancing it.
5. Not Paying Attention to the Resolution: When editing overlays, it is important to consider the resolution of the image. If the resolution is too low, the image may appear blurry or pixelated.
6. Not Using Appropriate Text Size: Text size should be adjusted according to the size of the overlay, as too large of a font can be distracting and too small of a font can be hard to read.
7. Not Utilizing Negative Space: Negative space can help to create a more visually appealing design and should be taken into account when editing overlays.
8. Not Aligning the Overlay Properly: When editing overlays, it is important to ensure that all elements are aligned properly. If elements are misaligned, it can detract from the overall design.