The iPhone is one of the most popular smartphones on the market, and its photo editor is no exception. With its wide variety of features, the iPhone photo editor allows you to quickly and easily edit your photos to make them look their best. Here is a guide to the best features of the iPhone photo editor.
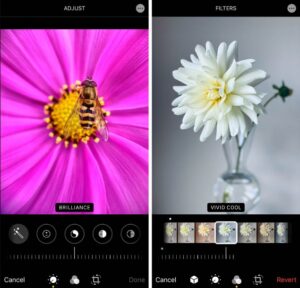
- Filters: Filters are one of the most popular features of the iPhone photo editor. With a variety of filters to choose from, you can quickly and easily add a unique look to your photos. From vintage and black and white to vibrant and blurred, you can find a filter that will help you create the perfect look for your photos.
- Brightness and Contrast: The Brightness and Contrast tools allow you to adjust the brightness and contrast of your photos. This can be useful if you want to make your photos look brighter or darker. You can also use the Brightness and Contrast tools to create a more dynamic look for your photos.
- Cropping: The Cropping tool allows you to remove unwanted parts of your photos. This can be useful if you want to focus on a particular area of your photo or if you want to make a photo fit a specific size or shape. You can also use the Cropping tool to make your photos look more balanced and symmetrical.
- Vignette: The Vignette tool allows you to add a subtle darkening of the edges of your photos. This can be used to draw attention to the center of your photos or to create a subtle, dreamy look.
- Texture: The Texture tool allows you to add a subtle texture to your photos. This can be used to create a vintage look or to add a bit of depth and interest to your photos.
Using the tools and features of the iPhone photo editor, you can quickly and easily edit your photos to make them look their best. With a little practice, you can create beautiful photos with a unique look.
How to Take Professional-Looking Photos with an iPhone Photo Editor
Taking professional-looking photos with an iPhone photo editor can be a great way to get creative and explore new photographic techniques. With the right knowledge and practice, you can create stunning images using nothing more than your phone. Here’s how to get started:
- Download a high-quality photo editor. There are many photo editing apps available for iPhone. Look for one that offers a wide range of features, such as advanced filters and tools, so you can have more control over your images.
- Select the right lighting. Natural light is great for taking photos, but you can also experiment with artificial lighting. Try different angles, levels of brightness, and colors to create the perfect shot.
- Experiment with different settings. Get familiar with the different settings and options on your photo editor. This will allow you to make the most of your images, such as adjusting the exposure and white balance.
- Make use of layers. Layers are a powerful tool in any photo editor. They allow you to stack different effects and adjust each layer individually. This can help you create complex images with a professional look.
- Adjust the colors. Color can make or break a photo, so it’s important to get it right. Experiment with different color combinations and saturation levels to find the perfect balance.
With a little practice and patience, you can take stunning photos on your iPhone. Use these tips to get started and explore the world of photo editing.
Exploring the Different Photo Editing Options Available with the iPhone Photo Editor
The iPhone photo editor is a powerful tool that allows users to manipulate and enhance their photos. With its wide range of features, users can make their images look professional and polished. Here, we explore the different photo editing options available with the iPhone photo editor, and how they can be used to create stunning results.
Firstly, the photo editor offers a suite of basic editing features. These include brightness and contrast adjustment, cropping, and the ability to rotate and flip images. With these tools, users can quickly and easily make basic adjustments to their photos, such as making them brighter or darker, or removing unnecessary elements.
The iPhone photo editor also provides a wide range of filters. These can be used to change the look of a photo, such as making it look older or giving it a more dreamy effect. Additionally, users can apply different effects to their photos, such as blurring, sharpening, and adding text.
The iPhone photo editor also includes a range of advanced tools, such as curves and levels. These can be used to adjust the color and tone of a photo, as well as to bring out details in certain areas. Additionally, users can adjust the white balance of a photo to make it look more natural.
Finally, the iPhone photo editor also offers a range of creative tools. These include the ability to add stickers, frames, and text to a photo, as well as the ability to create collages. With these features, users can create unique and personalized images.
In conclusion, the iPhone photo editor is a powerful and versatile tool that allows users to manipulate and enhance their photos. With its wide range of features, users can make their images look professional and polished.
Tips and Tricks for Enhancing Your Photos with an iPhone Photo Editor
- Adjust Brightness, Contrast, and Color: Utilizing the brightness, contrast, and color controls of an iPhone photo editor, you can make subtle adjustments to the color, contrast, and brightness of your photos to bring out the best in them.
- Sharpen Your Photos: Use the sharpening tools to add clarity and definition to your photos. This can help to enhance the details of your photos and make them look sharper and more vibrant.
- Contrast Adjustments: With the contrast adjustment tool, you can control the range of lightness and darkness within your photo. This can help to make your photos look more dynamic and add depth to them.
- Add Filters: Filters are a great way to enhance your photos and add interest to them. Experiment with different filters to find the best look for your photos.
- Fix Red-eye and Blemishes: Red-eye and blemishes can ruin a great photo. Use the blemish and red-eye removal tools of an iPhone photo editor to quickly and easily fix these issues.
- Crop Your Photos: Cropping your photos can help to improve their composition and focus the viewer’s attention. Use the crop tool to adjust the size and shape of your photos.
- Add Text and Graphics: Adding text or graphics to your photos can be a fun way to personalize them and add an extra layer of interest.
- Use Adjustment Layers: Adjustment layers are a powerful tool for making complex adjustments to your photos. With adjustment layers, you can make multiple adjustments to your photos without altering the original image.
- Utilize HDR: HDR (high dynamic range) can help to bring out the details in your photos and improve the overall look of them.
- Save Your Settings: Save your settings within the photo editor so that you can quickly apply them to similar photos in the future.
Creative Ways to Use the iPhone Photo Editor to Transform Your Photos
- Create an artistic painting effect. With the help of the iPhone Photo Editor, you can easily create an artistic painting effect on your photos. Simply select the ‘Paint’ option and select the desired brush and colour palette to create a unique abstract painting of your photo.
- Create a double exposure effect. The double exposure effect is a great way to blend two images together and create a unique image. With the help of the iPhone Photo Editor, you can easily create this effect by selecting the ‘Double Exposure’ option and blending two images together.
- Create an HDR effect. HDR stands for High Dynamic Range, which is a technique to enhance the contrast, colours and lighting of an image. With the help of the iPhone Photo Editor, you can easily create an HDR effect on your photos. Simply select the ‘HDR’ option and choose the desired settings to create a stunning effect.
- Adjust the perspective of an image. The iPhone Photo Editor also allows you to adjust the perspective of an image. This can be easily done by selecting the ‘Perspective’ option and manipulating the image as desired.
- Add a vignette effect. Vignettes are a great way to draw attention to the main subject of an image. With the help of the iPhone Photo Editor, you can easily add a vignette effect to your photos. Simply select the ‘Vignette’ option and adjust the settings as desired.
- Create a tilt-shift effect. The tilt-shift effect is a great way to make an image look like a miniature scene. With the help of the iPhone Photo Editor, you can easily create this effect by selecting the ‘Tilt-shift’ option and adjusting the settings as desired.
- Add text to an image. The iPhone Photo Editor also allows you to add text to your photos. Simply select the ‘Text’ option and enter the desired text to add captions to your images.