Background editing tools are increasingly popular among photographers and digital graphic artists who require precision in the post-processing of their images. Professional background-editing tools allow them to create high-quality images with a polished and professional look.
One of the main benefits of using a professional background-editing tool is that it can help to speed up the editing process. Professional background-editing tools provide a variety of features that can help to quickly and efficiently edit images. This can save time and effort, allowing users to focus on other aspects of their work.
Additionally, a professional background-editing tool can provide users with more control over their images. For example, users can use these tools to adjust the brightness, contrast, and saturation of their images, as well as the size, shape, and placement of certain elements. This allows users to create images that are tailored to their specific needs and preferences.
Furthermore, professional background-editing tools can help users to achieve a consistent look across their photos. These tools allow users to apply the same filters, effects, and adjustments to multiple images, ensuring that all of their images have a uniform look. This is particularly useful for photographers who want to maintain a consistent style in their work.
Finally, a professional background-editing tool can help users to save money. Professional tools come with a wide range of features and capabilities, allowing users to achieve professional-level results without the need to purchase expensive software packages. Furthermore, many of these tools are available for free, making them a cost-effective solution for those on a budget.
In conclusion, using a professional background-editing tool can provide photographers and digital graphic artists with a range of benefits. These tools can help to speed up the editing process, provide users with more control over their images, achieve a consistent look across photos, and save money.
Exploring the Different Types of Backgrounds for Photo Editing
Backgrounds are an essential part of photo editing and play a vital role in determining the overall look of the image. There are a variety of background options available to photographers, ranging from simple solid colors to intricate patterns and textures. The type of background chosen should depend on the desired outcome and the subject of the photograph.
Solid colors can be used to create a clean and simple look, while gradients can be used to add depth and interest. Textures can be used to create a vintage or distressed look. Patterns can be used to create a unique, eye-catching look. Depending on the desired effect, a background can be blurred for a softer look, or sharpened for a more intense look.
Backgrounds can also be changed to match the colors of the subject. For example, a bright yellow background can be used to emphasize a colorful flower, or a blue background can be used to bring out the color of a blue sky. The background can also be changed to create a contrast between the subject and the background. For instance, a black background can be used to bring out the details of a white flower.
In addition to the various types of backgrounds, photographers can also choose from a range of effects to further enhance their images. These effects can include vignetting, lens flares, and light leaks. All of these effects can be used to add a unique touch to the photograph.
Choosing the right background for a photograph can be an important part of the photo editing process. By selecting the right background, photographers can create an image that is truly unique and captures the essence of the subject.
How to Create Professional Photo Edits with Backgrounds
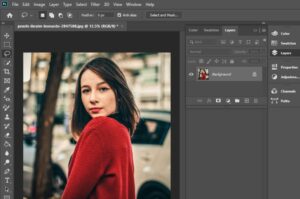
Creating professional photo edits with backgrounds is an essential skill for photographers, graphic designers, and business professionals. Professional photo edits require the use of specialized software, such as Adobe Photoshop, which allows you to manipulate images, adjust colors, and add backgrounds to your photos. In this article, we’ll explain how to create professional photo edits with backgrounds.
Before you begin, it’s important to select the right type of image for your background. The background should be appropriate for the subject of the photo and complement the colors of the foreground. For example, if the photo is of a person, you might choose a nature scene or a cityscape. If the photo is of a product or service, you might select an abstract or a texture.
Once you’ve chosen a background, open the image in Adobe Photoshop and select the “Layer” menu. Then, select “New Layer” and name the layer “Background”. Select the “Background” layer and click the “Add Layer” icon. This will add the background to the photo.
Next, you’ll need to adjust the orientation and size of the background to fit the photo. To do this, click the “Transform” tool and select “Scale”. Use the handlebars to adjust the size of the background until it fits the photo. You can also adjust the rotation of the background by clicking the “Rotate” tool and dragging the handlebars.
Once you’ve adjusted the orientation and size of the background, you can add effects to it. To do this, select the “Effects” tab in Adobe Photoshop and choose the effect you’d like to apply. Effects such as blur, color adjustment, and shadows can all be adjusted to create a professional photo edit.
Finally, save the edited image and you’re done! With a few simple steps, you can create professional photo edits with backgrounds to enhance your photos and impress your clients.
Tips and Tricks for Enhancing Backgrounds in Photos
1. Use a Reflector: A reflector is a great tool for adding light to a background and making it pop. Position the reflector in such a way that it bounces light off of the background and onto the subject of your photo.
2. Use Natural Light: Natural light is a great way to enhance a background in photos. When shooting outdoors, position yourself and your subject in a way that the sun is behind the subject and illuminating the background.
3. Utilize Backlighting: Backlighting can be used to create a beautiful and interesting background. Position your subject between the camera and the light source and the background will be illuminated.
4. Utilize Shallow Depth of Field: Shallow depth of field is a great way to blur the background of a photo and make it appear softer and more dreamlike. To achieve this effect, use a wide aperture and make sure that your subject is in focus while the background is blurred.
5. Play with Angles: Changing the angle at which you take the photo can dramatically alter the look and feel of the background. Play around with different angles to see which one works best with the background.
6. Experiment with Color: Color can be used to enhance the background of a photo. Use a colored filter or adjust the white balance of your camera to add a color cast to the background.
7. Create Contrast: Contrast can be used to make the background of a photo stand out. To create contrast, use a light-colored background and a dark-colored subject or vice versa.
8. Move Closer: Moving closer to the background can create interesting effects. By getting closer to the background, you can reveal details and textures that would otherwise be lost in a wider shot.
The Basics of Background Editing for Beginners
Background editing is a crucial part of the post-production process in photography and video. It involves making adjustments to the background of a photo or video to make the main subject stand out more. Background editing can be a great way to enhance the quality of an image or video and make it look more professional. This guide will provide a basic introduction to background editing for beginners.
Before getting started, it is important to understand the basic principles of background editing. First and foremost, it is important to understand the concept of depth of field. Depth of field is the area in a photo or video that is in focus. When editing a photo or video, you can adjust the depth of field to make the main subject stand out more and the background less visible.
Another important principle to understand is the concept of color grading. This is the process of adjusting the colors in a photo or video to make it look more vibrant and professional. Color grading can be used to make the main subject stand out more, while also making the background look more aesthetically pleasing.
When it comes to background editing, there are several tools available to help you achieve the desired effect. Photoshop is a great program for making basic adjustments to background elements. You can use the clone stamp tool to remove unwanted elements from the background, or use the brush tool to add in different colors and textures.
For more advanced editing, professional video editing software such as Adobe Premier or Final Cut Pro can be used. These programs allow you to make more detailed adjustments to the background, including color grading and adding effects.
Background editing can be a great way to enhance the quality of your photos and videos. With a bit of practice, you can make your images and videos look more professional and stand out from the crowd.
A Guide to Choosing the Right Background for Your Photo Edit
When you’re editing photos, choosing the right background can be the difference between a great photo and a mediocre one. A good background can be used to emphasize the subject of the photo, while a bad one can distract from it. Here are some tips to help you choose the right background for your photo edit.
1. Consider the Location of the Subject: The background you choose should be appropriate for the subject of the photo. For example, if the photo is of a beach, a beach background would be more appropriate than a cityscape. If the photo is of a cityscape, a cityscape background would be more appropriate than a beach background.
2. Choose a Color Scheme: Pay attention to the color scheme of the photo. For example, if the photo has a warm palette, choose a background with warm colors. If the photo has a cool palette, choose a background with cool colors.
3. Keep It Simple: A busy background can detract from the subject of the photo. When choosing a background, try to keep it as simple as possible to avoid distracting from the subject.
4. Consider the Lighting: Be aware of the lighting of the background when choosing one. For example, a bright background will make the photo look brighter, while a dark background will make the photo look darker.
5. Choose a Background That Compliments the Subject: The background should enhance the subject of the photo. It should not overpower it or take away from it.
By following these tips, you’ll be able to choose the right background for your photo edit. With the right background, your photos will look professional and eye-catching.