Miniature photography is a unique and creative form of photography which requires a steady hand, a keen eye, and a good understanding of the basics of photography. It involves taking photos of small objects or scenes, often using a macro lens or a zoom lens. Editing these images can be a challenge, but with the right techniques, you can create stunning results. Here is an overview of basic editing techniques for miniature photography.
First, it is important to understand the basics of composition when taking your photos. Refine your composition by making sure the background is clean and that the subject is well-lit. Pay attention to the angle of the light and the shadows, as these will be important for the editing process.
Once you have the photo, it’s time to get to work in the digital darkroom. A good place to start is with basic adjustments such as white balance, contrast, and sharpening. You can also use tools such as the selective color and hue/saturation sliders to further enhance the colors in your photo.
Another important editing technique is cropping. This can help you create a more balanced and aesthetically pleasing composition. It can also help you draw attention to the subject by eliminating unnecessary distractions from the background.
Finally, consider adding a vignette to your photo. This is a great way to draw the eye to the center of the image and emphasize the main subject. You can also use this technique to create a sense of depth and atmosphere.
With these basic editing techniques, you can create stunning miniature photographs. With practice and experimentation, you can develop your own unique style and create beautiful images.
Tips to Effectively Create Miniature Scenes in Your Photos
1. Choose a Proportionate Background: When creating miniature scenes in your photos, it is important to choose a background that is proportionate to the size of your miniature scene. A small background can create a sense of depth and make the miniature scene appear larger and more realistic.
2. Use Natural Lighting: Natural lighting is essential when creating miniature scenes in your photos. Avoid using flash or artificial lighting, as this can make the miniature scene look unnatural and flat. Instead, use natural light from a window or outdoor area to create a more realistic look.
3. Use Perspective: Perspective can help add a sense of realism to your miniature scene. For example, you can use a wide angle lens to create a wide perspective, or a telephoto lens to create a narrow perspective. This will help to make the miniature scene appear more realistic and dynamic.
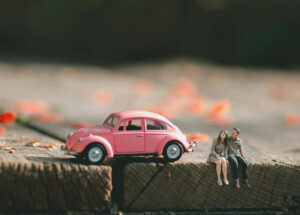
4. Use Props: Props can help to add realism and detail to your miniature scene. Choose props that match the theme and scale of your scene. For example, if you are creating a miniature city scene, you can use toy cars and buildings to add detail and realism.
5. Take Multiple Shots: Taking multiple shots of your miniature scene will help to ensure that you get the best possible photo. This will also allow you to experiment with different angles and perspectives, as well as different lighting sources.
By following these tips, you can create a realistic and eye-catching miniature scene in your photos. With a little practice and patience, you can take stunning photographs of your miniature scenes.
Exploring the Various Effects of Miniature Photo Editing
Miniature photo editing is a creative and unique form of photography that can produce amazing results. It is a process wherein a photograph is taken at a wide angle and then edited to create a miniature effect. This technique has been used to create surreal scenes, miniature cities, and even miniature people. It can be used to create an illusion of depth, create a dream-like atmosphere, or even create a fantastical world.
The most common way to achieve this effect is to use a tilt-shift lens on a camera. The tilt-shift lens creates a shallow depth of field, which allows the photographer to focus on a single point in the image while blurring out the rest. This technique is often used to create the illusion of a miniature world. It can also be used to blur out imperfections in a photograph, making it look more professional.
In addition to using a tilt-shift lens, there are also various editing techniques that can be used to make a photograph look like a miniature. For example, adjusting the colors and contrast can give the image a miniature look. The photographer can also apply blur to the background to create a more dream-like atmosphere. Additionally, the photographer can add various elements to the image such as trees, cars, or buildings in order to create the illusion of a miniature world.
When editing miniature photos, it is important to remember to keep the focus on the subject. Too much editing can make the photo look unnatural and distract from the subject. Also, it is important to use a good camera and lens to produce the best results.
Overall, miniature photo editing is an interesting and creative form of photography that can produce amazing results. With a bit of practice, a photographer can create surreal scenes, miniature cities, and even miniature people. By utilizing the tilt-shift lens and various editing techniques, the photographer can create a unique and stunning effect.
Techniques to Enhance Lighting and Color in Miniature Photos
1. Use a Reflector: Utilizing a reflector is an effective way to enhance lighting and color in miniature photos. A reflector can be placed opposite to a light source in order to bounce the light back onto the subject, creating a softer and more balanced light.
2. Utilize Natural Light: Whenever possible, utilize natural light sources to create lighting in miniature photos. Natural light will create a more natural look and feel to the image, as well as adding depth and dimension to the photo.
3. Experiment with Different Camera Settings: Experimenting with different camera settings such as aperture, shutter speed, and ISO can dramatically alter the look and feel of a photo. Utilizing a large aperture, for instance, can help to create a softer light and reduce the amount of light entering the camera.
4. Use Color Filters: Color filters can help to enhance the color in miniature photos by allowing only certain wavelengths of light to pass through the lens. By using a colored filter, you can add a more vibrant, dynamic look to your photos.
5. Post-Processing: Post-processing is another great way to enhance lighting and color in miniature photos. By using programs such as Photoshop or Lightroom, you can adjust and enhance the lighting and color of photos to create a polished and professional look.
Creating Depth and Dimension in Miniature Photography
Miniature photography is a great way to add depth and dimension to your photographs. This type of photography is a creative and unique way to capture a scene in a small scale. To create depth and dimension in miniature photography, there are a few key elements to consider.
Lighting is an important factor in miniature photography. The lighting should be bright, but not too bright, as this will create harsh shadows or washed out images. Try to use natural light for your miniature photography and if you must use artificial light, make sure it is diffused to create a soft lighting effect.
Using a shallow depth of field is another way to create depth and dimension in miniature photography. A shallow depth of field will allow only part of the image to be in focus while the rest of the scene remains blurred, giving the photo a sense of depth. To achieve a shallow depth of field, use a wide aperture setting and move close to the subject.
Using a wider angle lens is another way to add depth and dimension to your miniature photography. Wide angle lenses are great for capturing a wider scene, creating the illusion of depth in the photograph.
Finally, using props and other elements in your miniature photography can also help create depth and dimension. Props can help to add some context to the scene, making it look more realistic. Try to use props that are in scale with your miniature scene, such as tiny trees, cars, or buildings.
Creating depth and dimension in miniature photography is not always easy, but with the right techniques and elements, you can create stunning and unique photographs.
Popular Miniature Photo Editing Software and Apps
1. Adobe Photoshop Express: Adobe Photoshop Express is a miniature photo editing software designed by Adobe Systems. It provides a comprehensive set of tools to enhance, crop, and adjust photos. This software is available for both Windows and iOS devices.
2. Pixlr: Pixlr is a miniature photo editing app with a range of features such as layers, masks, and effects. It is available for both Android and iOS devices.
3. Fotor: Fotor is a miniature photo editing software with a variety of features such as special effects, photo stitching, and photo collage. It is available for both Windows and iOS devices.
4. BeFunky: BeFunky is a miniature photo editing app with a range of features such as filters, frames, and textures. It is available for both Android and iOS devices.
5. PhotoDirector: PhotoDirector is a miniature photo editing software with a range of features such as photo blending, special effects, and image stabilization. It is available for both Windows and iOS devices.