The JPG file format is widely used in digital photography and other graphics applications. Editing these files can be a bit of a challenge for users who are not familiar with the basics. This article will provide a basic overview of how to edit JPG files, including the various tools available and the different types of edits that can be performed.
First, it is important to understand the basics of JPG files. A JPG file is a compressed image format that is commonly used to store digital photographs and other graphic images. It is a lossy format, meaning that it compresses files by removing some of the data, resulting in a smaller file size. The data that is removed is typically not noticeable to the human eye, so the overall quality of the image is still good.
Once you understand the basics of JPG files, you can begin to explore the tools available for editing them. Most photo editing programs come with a variety of tools for editing JPG files, including cropping, resizing, color adjustment, and exposure adjustment. It is important to understand how to use each of these tools to achieve the desired effect.
Cropping is a common tool for editing JPG files. This involves removing part of an image to focus on the area of interest. For example, if you have a photo that includes a lot of extra background, you can crop it to focus on the main subject. Resizing is also a common tool for editing JPG files. This allows you to change the overall size of an image, which can be useful for making sure it fits into a specific area on a web page or document.
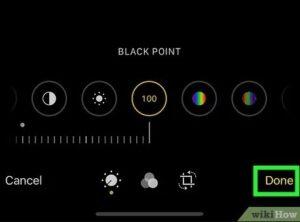
Color adjustment and exposure adjustment are also important tools for editing JPG files. Color adjustment allows you to change the colors of an image, while exposure adjustment allows you to adjust the overall brightness and contrast of an image. Both of these tools are essential for creating professional-looking images.
By understanding the basics of JPG files and exploring the various tools available for editing them, you can create stunning images with ease. With a little practice, you can become an expert at editing JPG files and creating amazing photos.
The Benefits of Using Professional JPG Editing Software
JPG editing software is a powerful and essential tool for professionals. It provides a variety of features that allow users to quickly and easily edit their images. From basic tasks such as resizing and cropping, to more complex tasks such as color correction and effects, professional JPG editing software can help professionals achieve the perfect look for their images. Here are some of the benefits of using professional JPG editing software.
First and foremost, professional JPG editing software provides a wide range of features that allow users to manipulate the image in a variety of ways. It provides easy-to-use tools for basic tasks such as resizing, cropping and rotating, as well as more complex features such as color correction, levels adjustment and special effects. This makes it easier for users to customize their images to their specific needs.
Additionally, professional JPG editing software also provides advanced tools for more advanced tasks. This includes tools for photo retouching, such as removing blemishes and smoothing out skin tones, as well as tools for creating special effects. This allows users to create unique and creative images that stand out from the crowd.
Furthermore, professional JPG editing software also provides a range of automated tools that make it easier for users to quickly and easily edit their images. These include tools for batch processing, which allow users to quickly apply the same effects to multiple images at once. This saves time and effort, allowing users to focus on more important tasks.
Finally, professional JPG editing software also offers a wide range of features that make it easier for users to share their images with others. It supports a variety of formats, including JPEG, GIF and PNG, and also provides features such as image compression and watermarking. This makes it easier for users to share their images with the world without compromising quality.
In conclusion, professional JPG editing software offers a range of features that make it easier for users to quickly and easily edit their images. From basic tasks such as resizing and cropping, to more complex tasks such as color correction and special effects, professional JPG editing software can help professionals achieve the perfect look for their images. Additionally, it also provides a range of automated tools that make it easier for users to quickly and easily edit their images, as well as a range of features that make it easier for users to share their images with the world.
Tips for Optimizing the Quality of Your JPEG Images
- Set the image’s resolution to 72 PPI (pixels per inch). This will help ensure that the image stays as sharp and clear as possible, as higher resolution images can lead to fuzzy, grainy images.
- Adjust the image’s brightness and contrast. This can help to enhance the clarity and quality of the image.
- Use the “Save for Web” feature in Adobe Photoshop or other photo editing software. This will help to reduce the file size of the image while still preserving the image’s quality.
- Adjust the compression level when saving the image. Higher compression levels will reduce the size of the image and the quality of the image. Lower compression levels will increase the size of the image and the quality of the image.
- Use a high-quality photo editing software such as Adobe Photoshop. This will ensure that the image is sharp and clear.
- Avoid resizing images. Resizing can cause the image to become pixelated or blurry.
- Use the “Progressive” option when saving the image. This will help to ensure that the image loads quickly online.
- Sharpen the image to help improve its clarity and sharpness.
- Use the “Save As” feature when saving the image. This will help to ensure that the original image is not overwritten.
- Optimize the image for the web. This means compressing the image to reduce its file size while still maintaining its quality.
How to Create Custom Effects with JPG Editing Tools
JPG editing tools can be used to create custom effects on digital images. The tools provide a wide range of features and capabilities that allow users to edit photos in a variety of ways. This article will provide an overview of the features and capabilities of JPG editing tools, as well as step-by-step instructions for creating custom effects.
The first step in creating custom effects with JPG editing tools is to select the image you want to edit. Once the image is selected, the user can access the tools to modify the image. Most JPG editing tools offer a wide range of features and capabilities that allow the user to modify the image in various ways. These include adjusting brightness and contrast, cropping and resizing, adding filters and effects, and more.
Once the user has adjusted the image, they can apply custom effects to create the desired result. Custom effects can be applied using the tools’ selection of filters and effects. These filters and effects come in a variety of options, ranging from simple adjustments to more complex effects. Some editing tools even allow users to create their own custom effects by combining multiple filters and effects.
Finally, the user can save their image with the custom effects applied. Most JPG editing tools allow users to save their images in a variety of formats, including JPG, PNG, and TIFF.
By following these steps, users can create custom effects with JPG editing tools. With the wide range of features and capabilities available, users can create unique and professional-looking images with just a few clicks.
A Guide to Enhancing Your Images with JPG Editing Techniques
JPG (or JPEG) images are a popular type of digital image format used for many different purposes. JPG editing is the process of adjusting and manipulating the image to enhance its appearance or make it look more attractive. This guide provides an overview of the different JPG editing techniques that can be used to improve the overall quality of your images.
The first step in JPG editing is to adjust the image’s brightness and contrast. This can be done by using a photo editor or image manipulation software. The brightness and contrast can be adjusted to make the image appear brighter or darker, depending on your preference. If the image is too bright or too dark, it can be adjusted to make it look more natural and balanced.
The next step is to adjust the color of the image. You can use color correction tools to adjust the hue, saturation, and luminance of the image. You can also use color balance tools to make the colors in the image more vibrant.
The third step is to adjust the sharpness of the image. You can use sharpening tools to make the details of the image stand out more clearly.
The fourth step is to adjust the size of the image. You can use resizing tools to make the image smaller or larger, depending on your needs.
Finally, you can add special effects such as filters and effects to the image. You can use these effects to make the image more vivid or to create a certain mood or atmosphere.
These are just a few of the JPG editing techniques that can be used to improve the overall quality of your images. With practice and experimentation, you can become an expert at JPG editing and create amazing images.