- Understand the Lightroom Interface: Before beginning to edit photos in Lightroom, it is important to familiarize yourself with the tools and interface. This will make it easier to navigate the program and will help you make the most of the program’s features. Take some time to explore the menus and panels before you start editing.
- Organize Your Photos: Lightroom makes it easy to organize and sort your images. Utilize the Library module to create collections, sort photos into albums, set flags, and assign keywords. Once you have your photos sorted and organized, you’ll be able to quickly find and edit the ones you need.
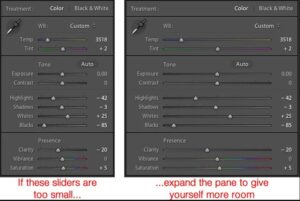
- Utilize the Develop Module: The Develop module is where you will do most of your editing. Here you can adjust the white balance, exposure, contrast, saturation, and more. Take your time and experiment with the different tools to get the look you want.
- Use Presets: Presets are pre-made sets of adjustments that you can apply to photos with a single click. If you find yourself applying the same changes over and over, using a preset can save you time.
- Get Creative: Don’t be afraid to explore and experiment with different techniques in Lightroom. Try out black and white conversion, split toning, and vignetting to give your photos a unique look.
How to Use Lightroom to Enhance Your Travel Photos
Travel photographs often capture memories that last a lifetime, so it is important to make sure that they look their best. Adobe Lightroom is a powerful photo editing software that can help you enhance your travel photos so that they look professional and stunning. Here are some tips for using Lightroom to make your travel photos look their best.
First, start by importing your photographs into Lightroom. This can be done by connecting your camera or memory card directly to your computer or by transferring the photos from your camera roll. Once the photos have been imported, you can begin to make adjustments.
To enhance the colors of your photos, use the Tone Curve and the HSL (Hue, Saturation, and Luminance) sliders. With the Tone Curve, you can adjust the contrast, highlights, and shadows of the photo. For the HSL sliders, you can adjust the hue, saturation, and luminance of colors in the photo. Another helpful tool is the Clarity slider, which increases the contrast between colors, making the image look sharper.
To make the colors in your photos pop, you can use the Vibrance and Saturation sliders. These sliders will affect the intensity of the colors in the photo. You can also use the Light and Color sliders to adjust the overall brightness and color balance of the photo.
Finally, you can use the Sharpen and Noise Reduction tools to make your photos look sharper and reduce any graininess. The Sharpen tool will help to bring out the details in the photo, and the Noise Reduction tool will help to reduce any visual noise.
By using these tools and techniques, you can use Lightroom to make your travel photos look beautiful and professional. With Lightroom, you can quickly and easily bring out the best in your travel photos.
A Guide to Lightroom Presets and How to Use Them
Lightroom presets are digital filters that allow photographers to quickly and easily apply effects to their photos with just a few clicks. They can save time, streamline workflow, and help photographers achieve a consistent look across their images. In this guide, we’ll explain what Lightroom presets are, how to install and use them, and how to create your own to get the exact look you want.
What Are Lightroom Presets?
Lightroom presets are a set of saved adjustments that can be applied to a photo with just one click. These adjustments can include everything from exposure, white balance, and sharpening, to creative effects like color toning and split toning. Many presets are designed to give your photos a certain look, such as a vintage feel or a vivid effect.
How to Install and Use Lightroom Presets
Installing Lightroom presets is easy. To install presets that you’ve purchased or downloaded from the web, simply unzip the file and copy the .lrtemplate files into the Lightroom Presets folder. To use the presets, simply open Lightroom and select the image you want to apply the preset to. Then, navigate to the Presets tab in the Develop module and select the preset you want to use.
Creating Your Own Lightroom Presets
Creating your own presets is a great way to get the exact look you want for your images. To create a preset, start by making the adjustments you want to the photo. Then, click the + icon next to the Presets tab and give your preset a name. Finally, check the boxes for the adjustments you want to include in your preset and click “Create.” Your new preset will then be ready to use.
Using Lightroom Presets
Lightroom presets can be a great way to save time and achieve a consistent look across your images. They can also be used to create unique and creative effects. With a little practice, you’ll soon be able to create your own custom look for your photos.
Unveiling the Secrets of Black and White Editing with Lightroom
The art of black and white photography is one that has been around for centuries, but it is still one of the most popular forms of photography today. With the advent of digital photography and image editing software such as Adobe Lightroom, it is now easier than ever to create stunning black and white images. In this article, we will discuss how to use Lightroom to get the most out of your black and white images.
The first step in creating a beautiful black and white image is to adjust the exposure. To do this, use the Exposure slider in Lightroom to adjust the midtone brightness of your image. Generally, you want the midtones to be slightly brighter than the highlights and shadows. Additionally, you can use the Contrast slider to add or reduce contrast in your image.
Next, you will want to adjust the white balance of your image. To do this, use the White Balance Selector tool in Lightroom. This tool allows you to adjust the color temperature of your image, giving it a warmer or cooler tone.
The last step in creating a beautiful black and white image is to adjust the tones. To do this, use the Tone Curve tool in Lightroom. This tool allows you to adjust the brightness of the highlights, midtones, and shadows of your image. Additionally, you can use the Saturation & Vibrance controls to add or reduce the color saturation in your image.
By following these steps, you can easily create stunning black and white images with Lightroom. With just a few simple adjustments, you can create amazing images that will last a lifetime.
Top 10 Lightroom Plugins to Help You Edit Faster and Better
- Perfectly Clear: Perfectly Clear provides photographers with a suite of powerful photo editing tools that help them quickly and easily optimize their photos. From color correction and noise reduction to sharpening and exposure adjustment, Perfectly Clear helps take the guesswork out of photo editing.
- NIK Collection: The NIK Collection is a comprehensive suite of photo editing tools that allow photographers to create stunning photos with ease. Included in the collection are plugins for sharpening, noise reduction, HDR, black and white conversion, and more.
- Lightroom Classic CC: Lightroom Classic CC is an indispensable plugin for photographers who want to edit photos quickly and with ease. This plugin offers a range of tools and features that make it easy to edit photos quickly, including the ability to apply preset effects, adjust color and exposure, remove noise and apply sharpening.
- Topaz Labs: Topaz Labs is a suite of photo editing plugins designed to help photographers quickly and easily apply creative effects to their photos. From color effects to texture overlays and more, Topaz Labs helps photographers easily create unique and professional-looking images.
- DxO Optics Pro: DxO Optics Pro is a powerful plugin designed to help photographers quickly and easily edit photos with a range of advanced tools. With this plugin, photographers can easily adjust colors, remove noise, sharpen images, and more.
- Color Efex Pro: Color Efex Pro is a powerful plugin that helps photographers quickly and easily edit photos to create stunning effects. With this plugin, photographers can adjust colors, apply creative filters, and add a range of creative effects to their photos.
- Photomatix Pro: Photomatix Pro is a powerful plugin designed to help photographers quickly and easily create stunning HDR photos. With this plugin, photographers can adjust exposures, add tone mapping and local contrast enhancements, and more.
- Alien Skin Exposure: Alien Skin Exposure is a powerful plugin that helps photographers quickly and easily apply creative effects to their photos. This plugin includes a range of features that allow photographers to adjust colors, add creative textures, and more.
- ON1 Photo RAW: ON1 Photo RAW is a powerful plugin designed to help photographers quickly and easily edit photos with a range of advanced tools. With this plugin, photographers can easily adjust colors, remove noise, apply creative effects, and more.
- Luminar: Luminar is a powerful photo editing plugin that helps photographers quickly and easily create stunning images. With this plugin, photographers can easily adjust colors, apply creative effects, and add a range of creative filters to their photos.